KDE Self-Service Onboarding
Overview
The KDE (Kyndryl Developer Experience) Self-Service Onboarding feature enables squad leaders to independently onboard and manage their squads, systems, components, APIs, and related resources. This unified and guided interface minimizes dependency on platform administrators, standardizes onboarding workflows, and significantly accelerates time-to-value for engineering teams. This document covers the following sections:
Prerequisites
Before starting the self-service onboarding process, ensure the following prerequisites are met:
- You have access to the KDE Portal.
- You have a valid enterprise user account (corporate email).
Squad Onboarding
Squad onboarding is the first step in the self-service journey. During this process, a user requests elevation to the Squad Owner role, which grants permissions to manage squad members and technical entities.
Initiating the Request
Follow the steps below to initiate a squad onboarding request:
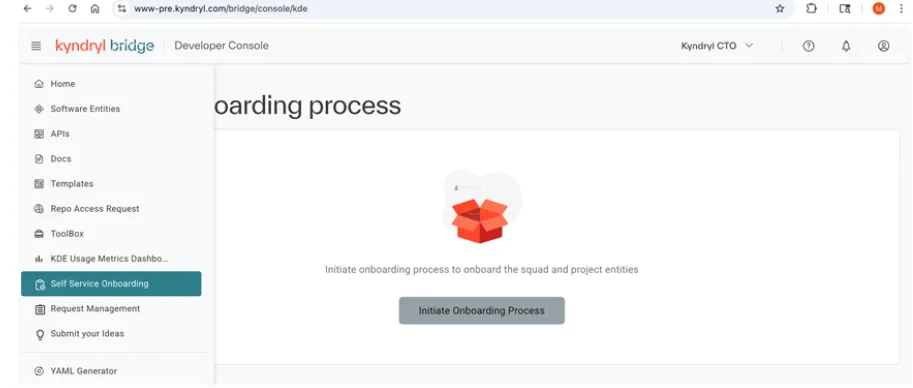
- Navigate to the Self-Service Onboarding page in the KDE Portal.
- The landing screen displays the option to initiate the onboarding process.
- Click the "Initiate Onboarding Process" button.
- Complete the Request Details form:
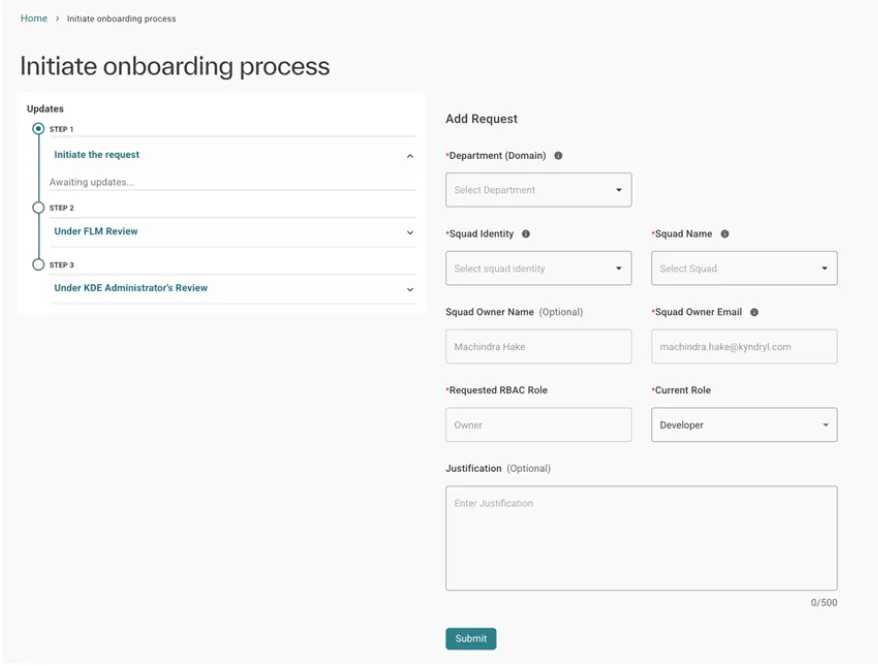
- Department: Select your organization. This automatically populates the Squad Identity prefix based on GEMU GitHub team mappings.
- Squad Name: Select your squad from the fetched ADO teams list. If not listed, use the "Add new squad" option to manually enter the squad name.
- Squad Owner Email: Auto-populated from your user profile.
- Requested RBAC Role: Auto-filled as Owner.
- Current Role: Select your current role from the available options.
During onboarding, the system automatically provisions role-based access control (RBAC) groups:
- Owner (Admin): Full administrative access for squad, entities, and members.
- Developer (Read-Write): Can create and modify systems and entities.
- Viewer (Read-Only): View-only access to entities.
- Click Submit to send the onboarding request for approval.
Approval Process
After submission, the onboarding request progresses through a transparent approval workflow, which is visualized using the Squad Onboarding Stepper.
The approval stages include:
- Initiate the Request – Request successfully submitted.
- Under FLM Review – Approval from the First-Line Manager.
- Under KDE Administrator Review – Final validation by the KDE platform administrators.
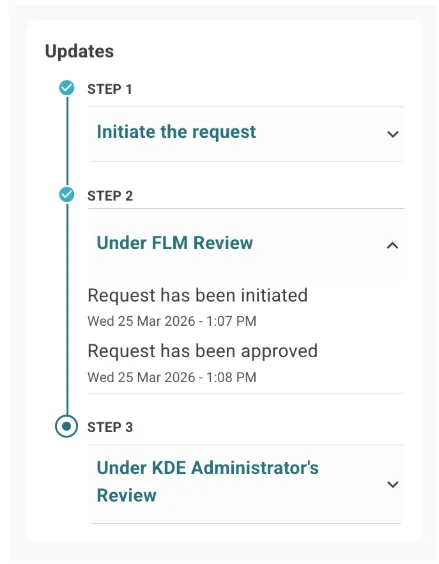
Note: The current status of the onboarding request can be tracked at any time from the onboarding landing page.
Squad Management
Once the onboarding request is approved, you are granted Squad Owner access and redirected to the Squad Dashboard. This dashboard provides centralized control over squad members and project entities. And visibility into entity statistics, and onboarding activity status.
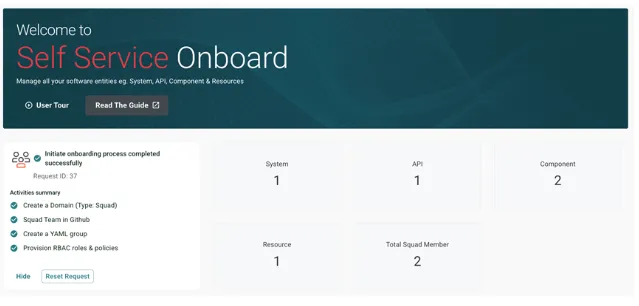
Activity Summary
The Activity Summary card confirms successful execution of backend onboarding steps.
- Domain (Squad) creation
- GitHub squad team setup
- YAML group creation
- RBAC role and policy provisioning
Entity & Squad Statistics
The dashboard displays real-time counts of Systems, APIs, Components, Resources, and Total Squad Members.
My Team Tab
The My Team tab displays squad-level configuration details and member information.
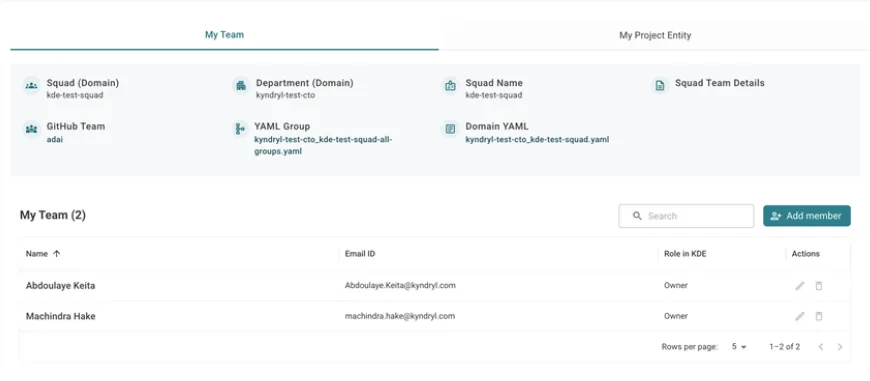
Header Information
The header section displays important squad metadata, including:
- Squad & Department mapping.
- GitHub Team and YAML Group references.
- Domain YAML configuration link.
Managing Members
The squad member table allows you to perform the following actions:
- Add Members: Invite new users to the squad.
- Edit Role: Update a member’s role using the pencil icon.
- Remove Members: Remove users using the delete (trash) icon.
- Search: Quickly locate members using the search bar.
System & Entity Onboarding
The My Project Entity tab serves as the primary workspace for managing systems and their associated entities. Entities are displayed in a hierarchical structure, with Systems as top-level nodes.
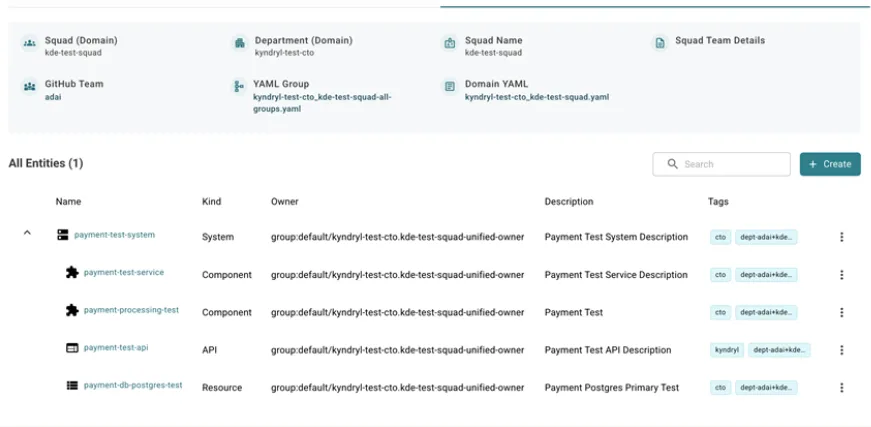
Creating a System
To onboard a new system, perform the following steps:
- Click the + Create button in the top-right corner of the dashboard.
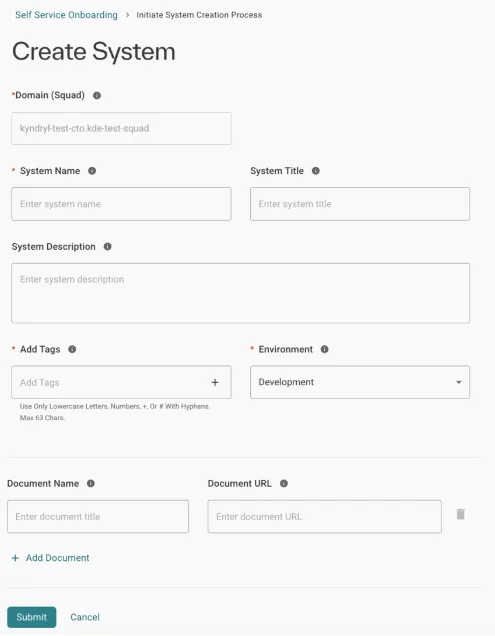
- Complete the Create System form:
- Domain (Squad): Auto-filled based on your squad context.
- System Name & Title: Unique identifier and display name.
- Description: Brief explanation of the system’s purpose.
- Tags: Mandatory for classification and discoverability.
- Environment: Target environment (e.g., Development, Test, Production).
- Documents: Reference documentation names and URLs.
- Click Submit to create the system.
Adding Child Entities
APIs, Components, and Resources are created under an existing system to maintain logical grouping.
Steps to add a child entity:
- Locate the parent system in the All Entities table.
- Click the three-dot (ellipsis) menu for the system.
- Select Create API, Create Component, or Create Resource.
- Complete the entity-specific form, including:
- Basic Details: Name, Title, Description.
- Tags: Mandatory classification tags.
- Technical Details: Repository links, lifecycle, specification type, etc.
- Documents: Related references and URLs.
- Click Save to create the entity.
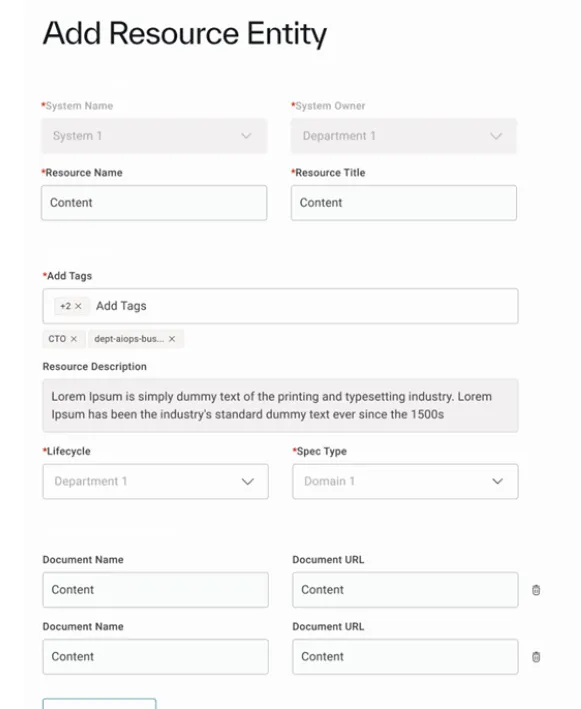
Add Resource Entity
Resource entities represent infrastructure or external dependencies such as databases or messaging systems.
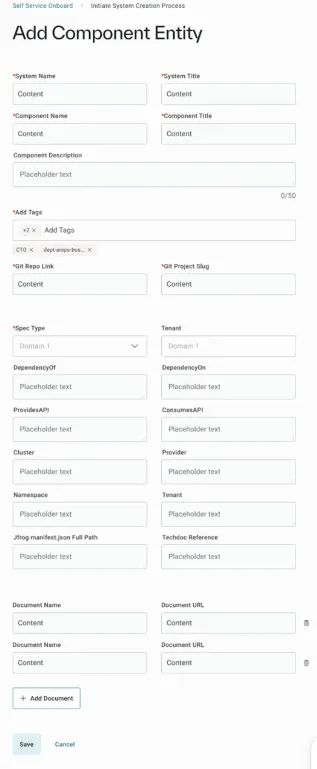
Add Component Entity
Component entities describe deployable services and include dependency mapping, cluster details, and API relationships.
Add API Entity
API entities capture interface definitions and integration details including spec type, lifecycle, repositories, and documentation.
Managing Entities
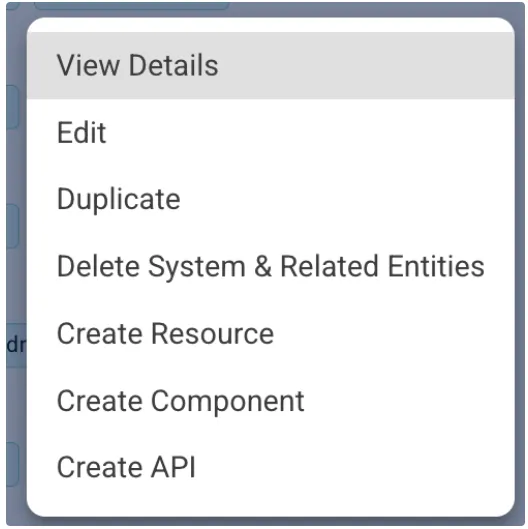
Each entity row provides management actions via the three-dot menu:
- View Details: Open a detailed configuration view.
- Edit: Update editable fields of the entity.
- Duplicate: Create a copy for faster onboarding of similar entities.
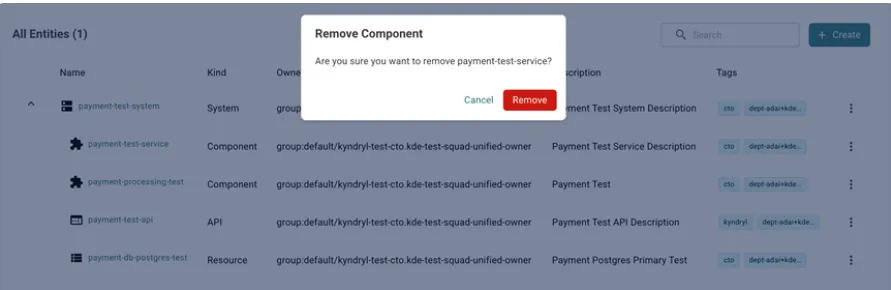
- Delete:
- Systems: Delete system along with all related entities.
- Child entities: Remove individual APIs, components, or resources.
System entity actions:
Delete the entity: