Send a Serial Command on Receiving a UDP Message
This article shows how to send a serial command when a UDP message is received by the player.
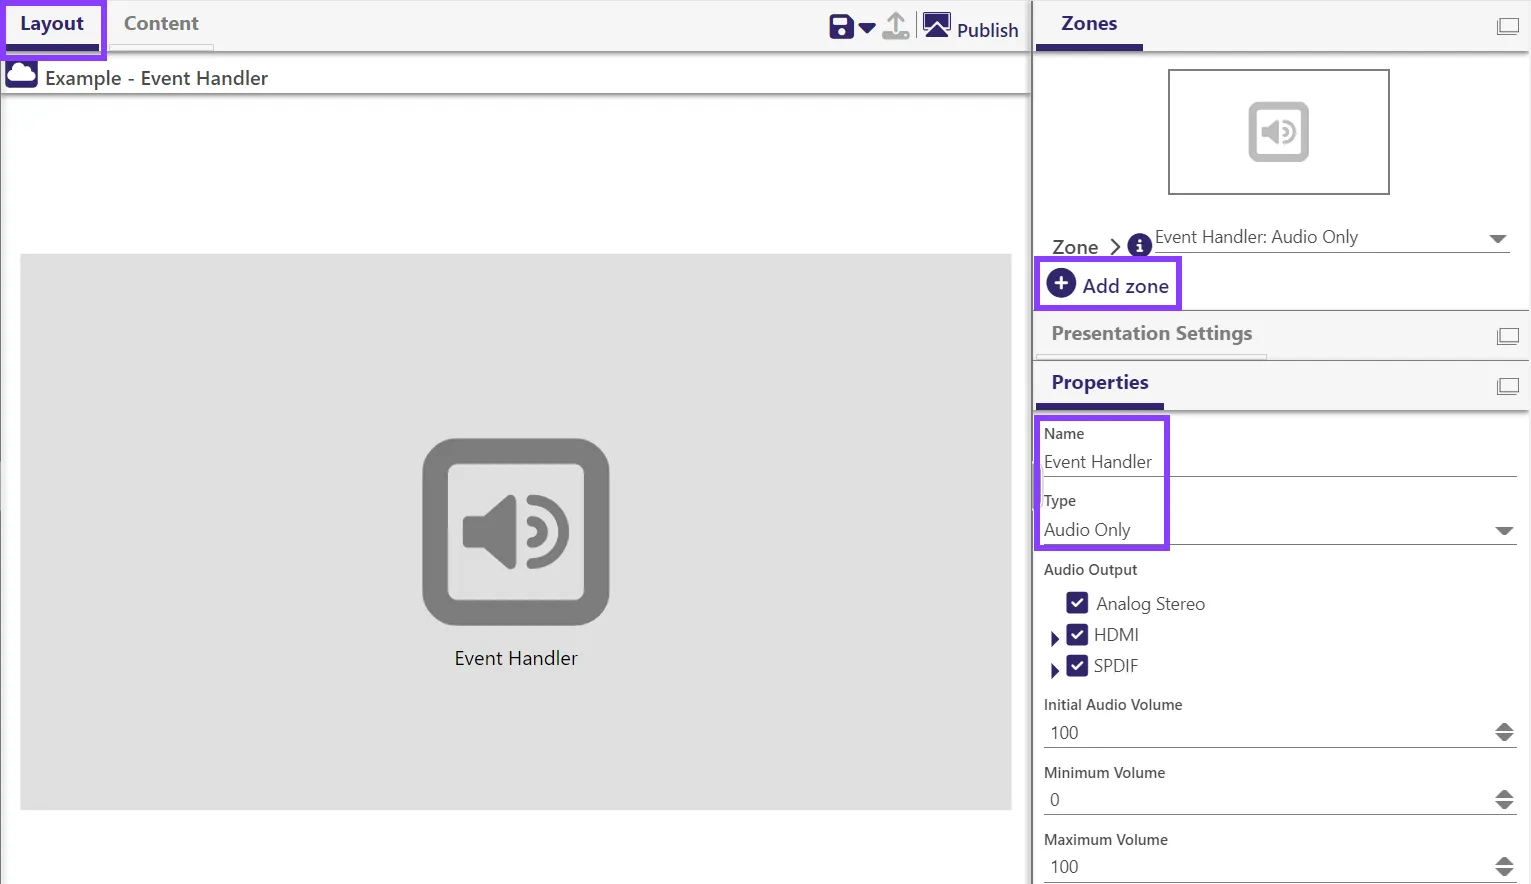
In a new presentation, under Layout > Zones, select Add Zone.
Resize the zone, give it a name (for example, "Event Handler"), and under Type, select Audio Only.
Switch to the Content tab and toggle from Simple presentation to Advanced presentation.
Go to Widgets and drag and drop the Event Handler widget into the playlist area.
Under Events, select the UDP event to activate it, and then select the Event Handler state (make sure to click on the Event Handler text; it will highlight when you hover over it) to attach it, as shown in the image below.
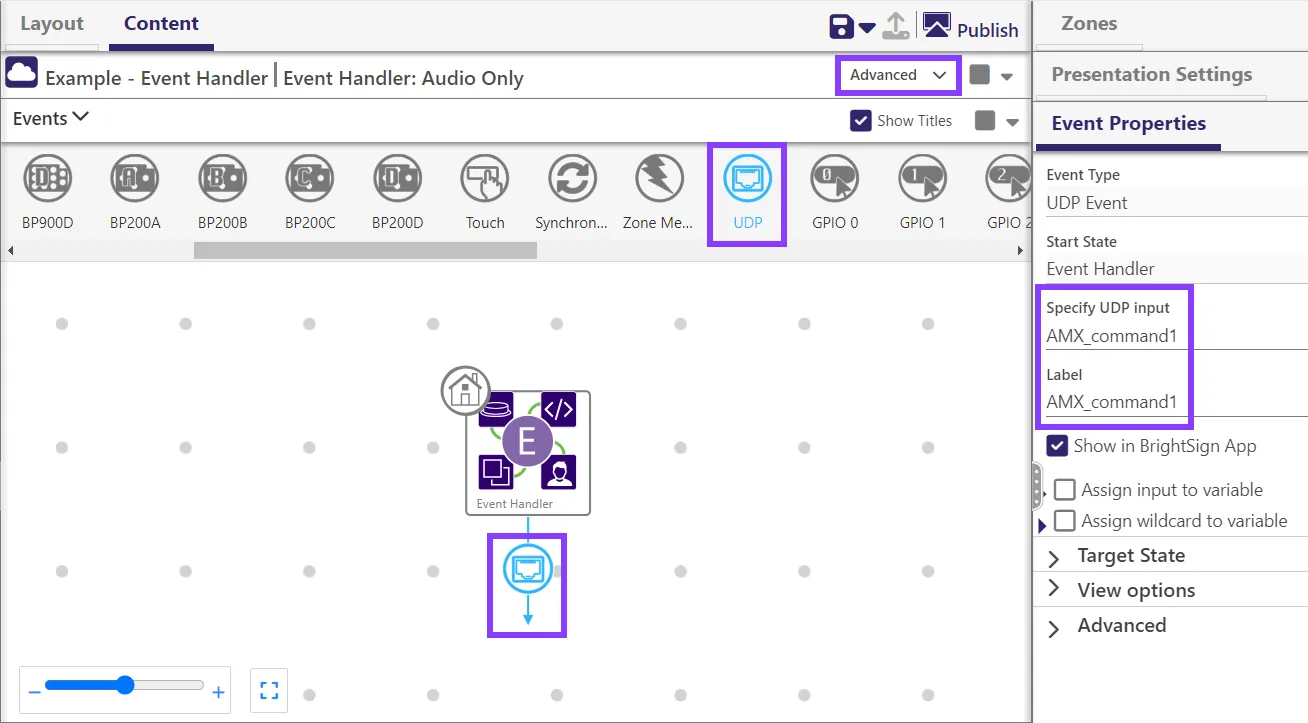
In Event Properties > Specify UDP Input enter the UDP input that the player will be listening for (for example, “AMX_Command1").
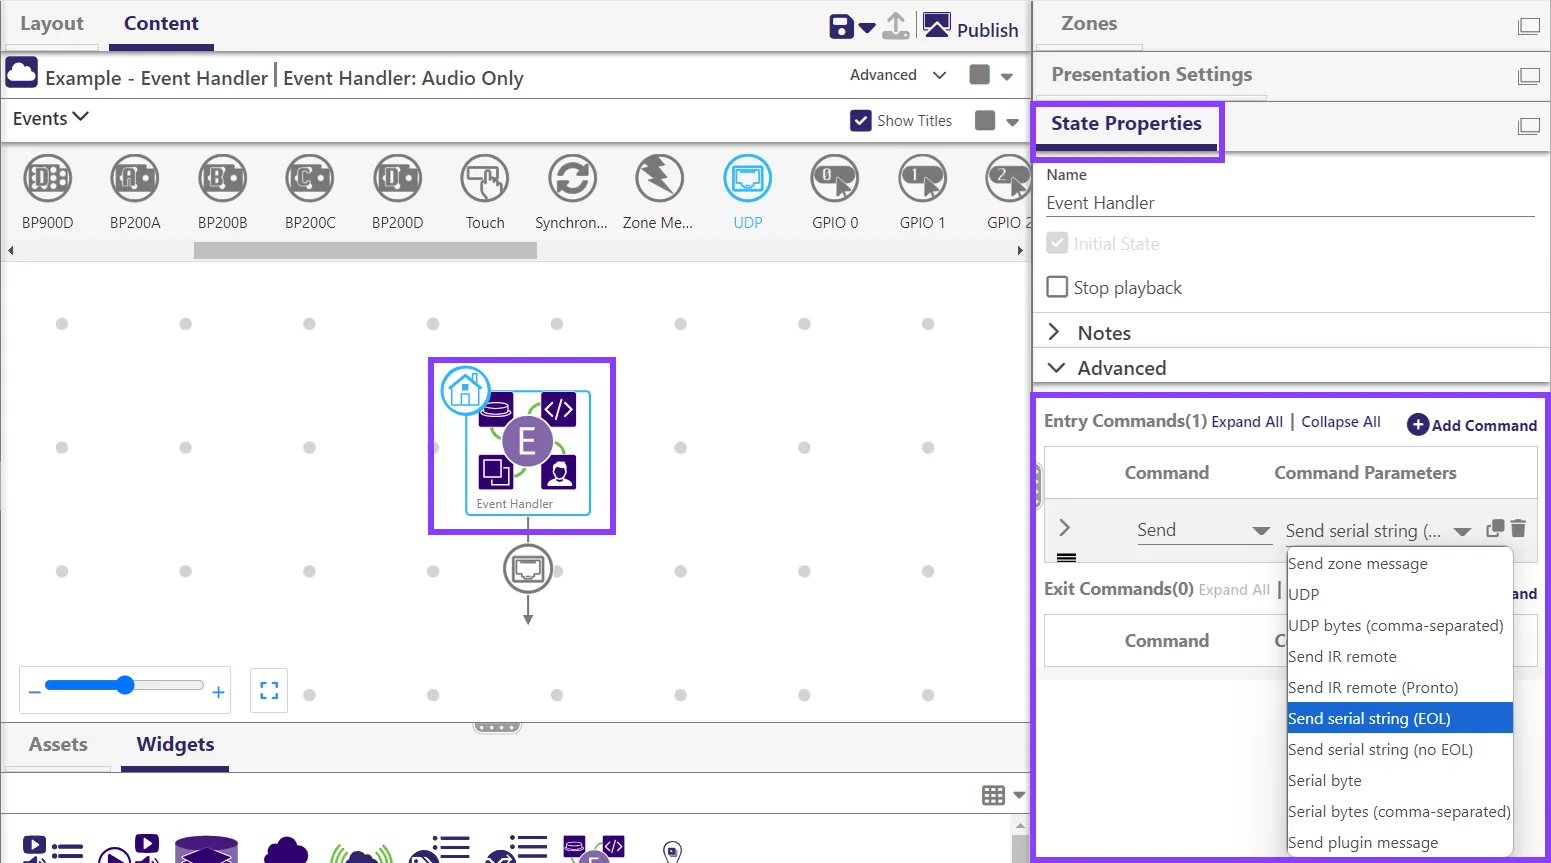
With the state selected (notice that Event Properties turns to State Properties), select Add Command in the Advanced tab.
- Select the type of serial command to send - Send serial string (EOL), Send serial string (no EOL), Serial byte, or Serial byte (comma-separated) -once the UDP input message is received.
- Enter the serial command string/value.
Configure the serial port setting by navigating to Presentation Settings > Interactive > Connectors. The serial settings from this panel must match the serial settings of the device you would like the player to communicate with (i.e. Baud rate, Data bits, Parity, Stop bits, Protocol, Send EOL, Receive EOL). The 3.5mm serial connector on the player is referred to as "Port 0".
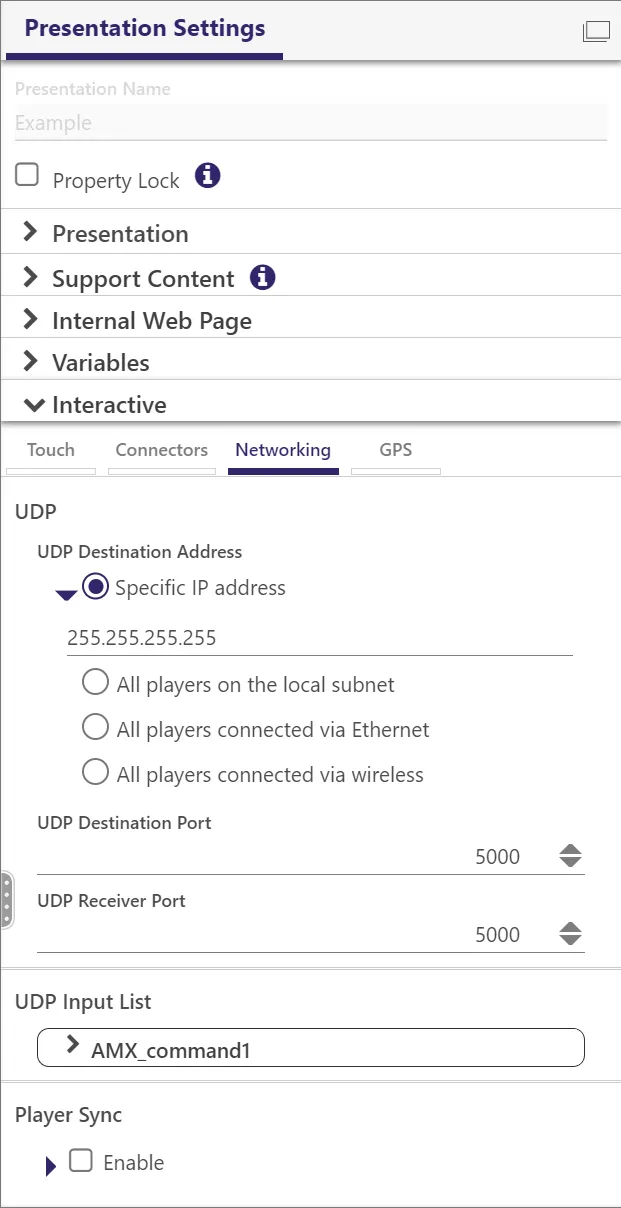
Go to Presentation Settings > Interactive > Networking and ensure the UDP Destination Port and UDP Receiver Port are set to the same value as your UDP controller (the AMX controller in these images).