Roles
This screen allows you to view the permissions of different roles and add new roles to your network. You must be a BrightSign Author Plus user to access this page.
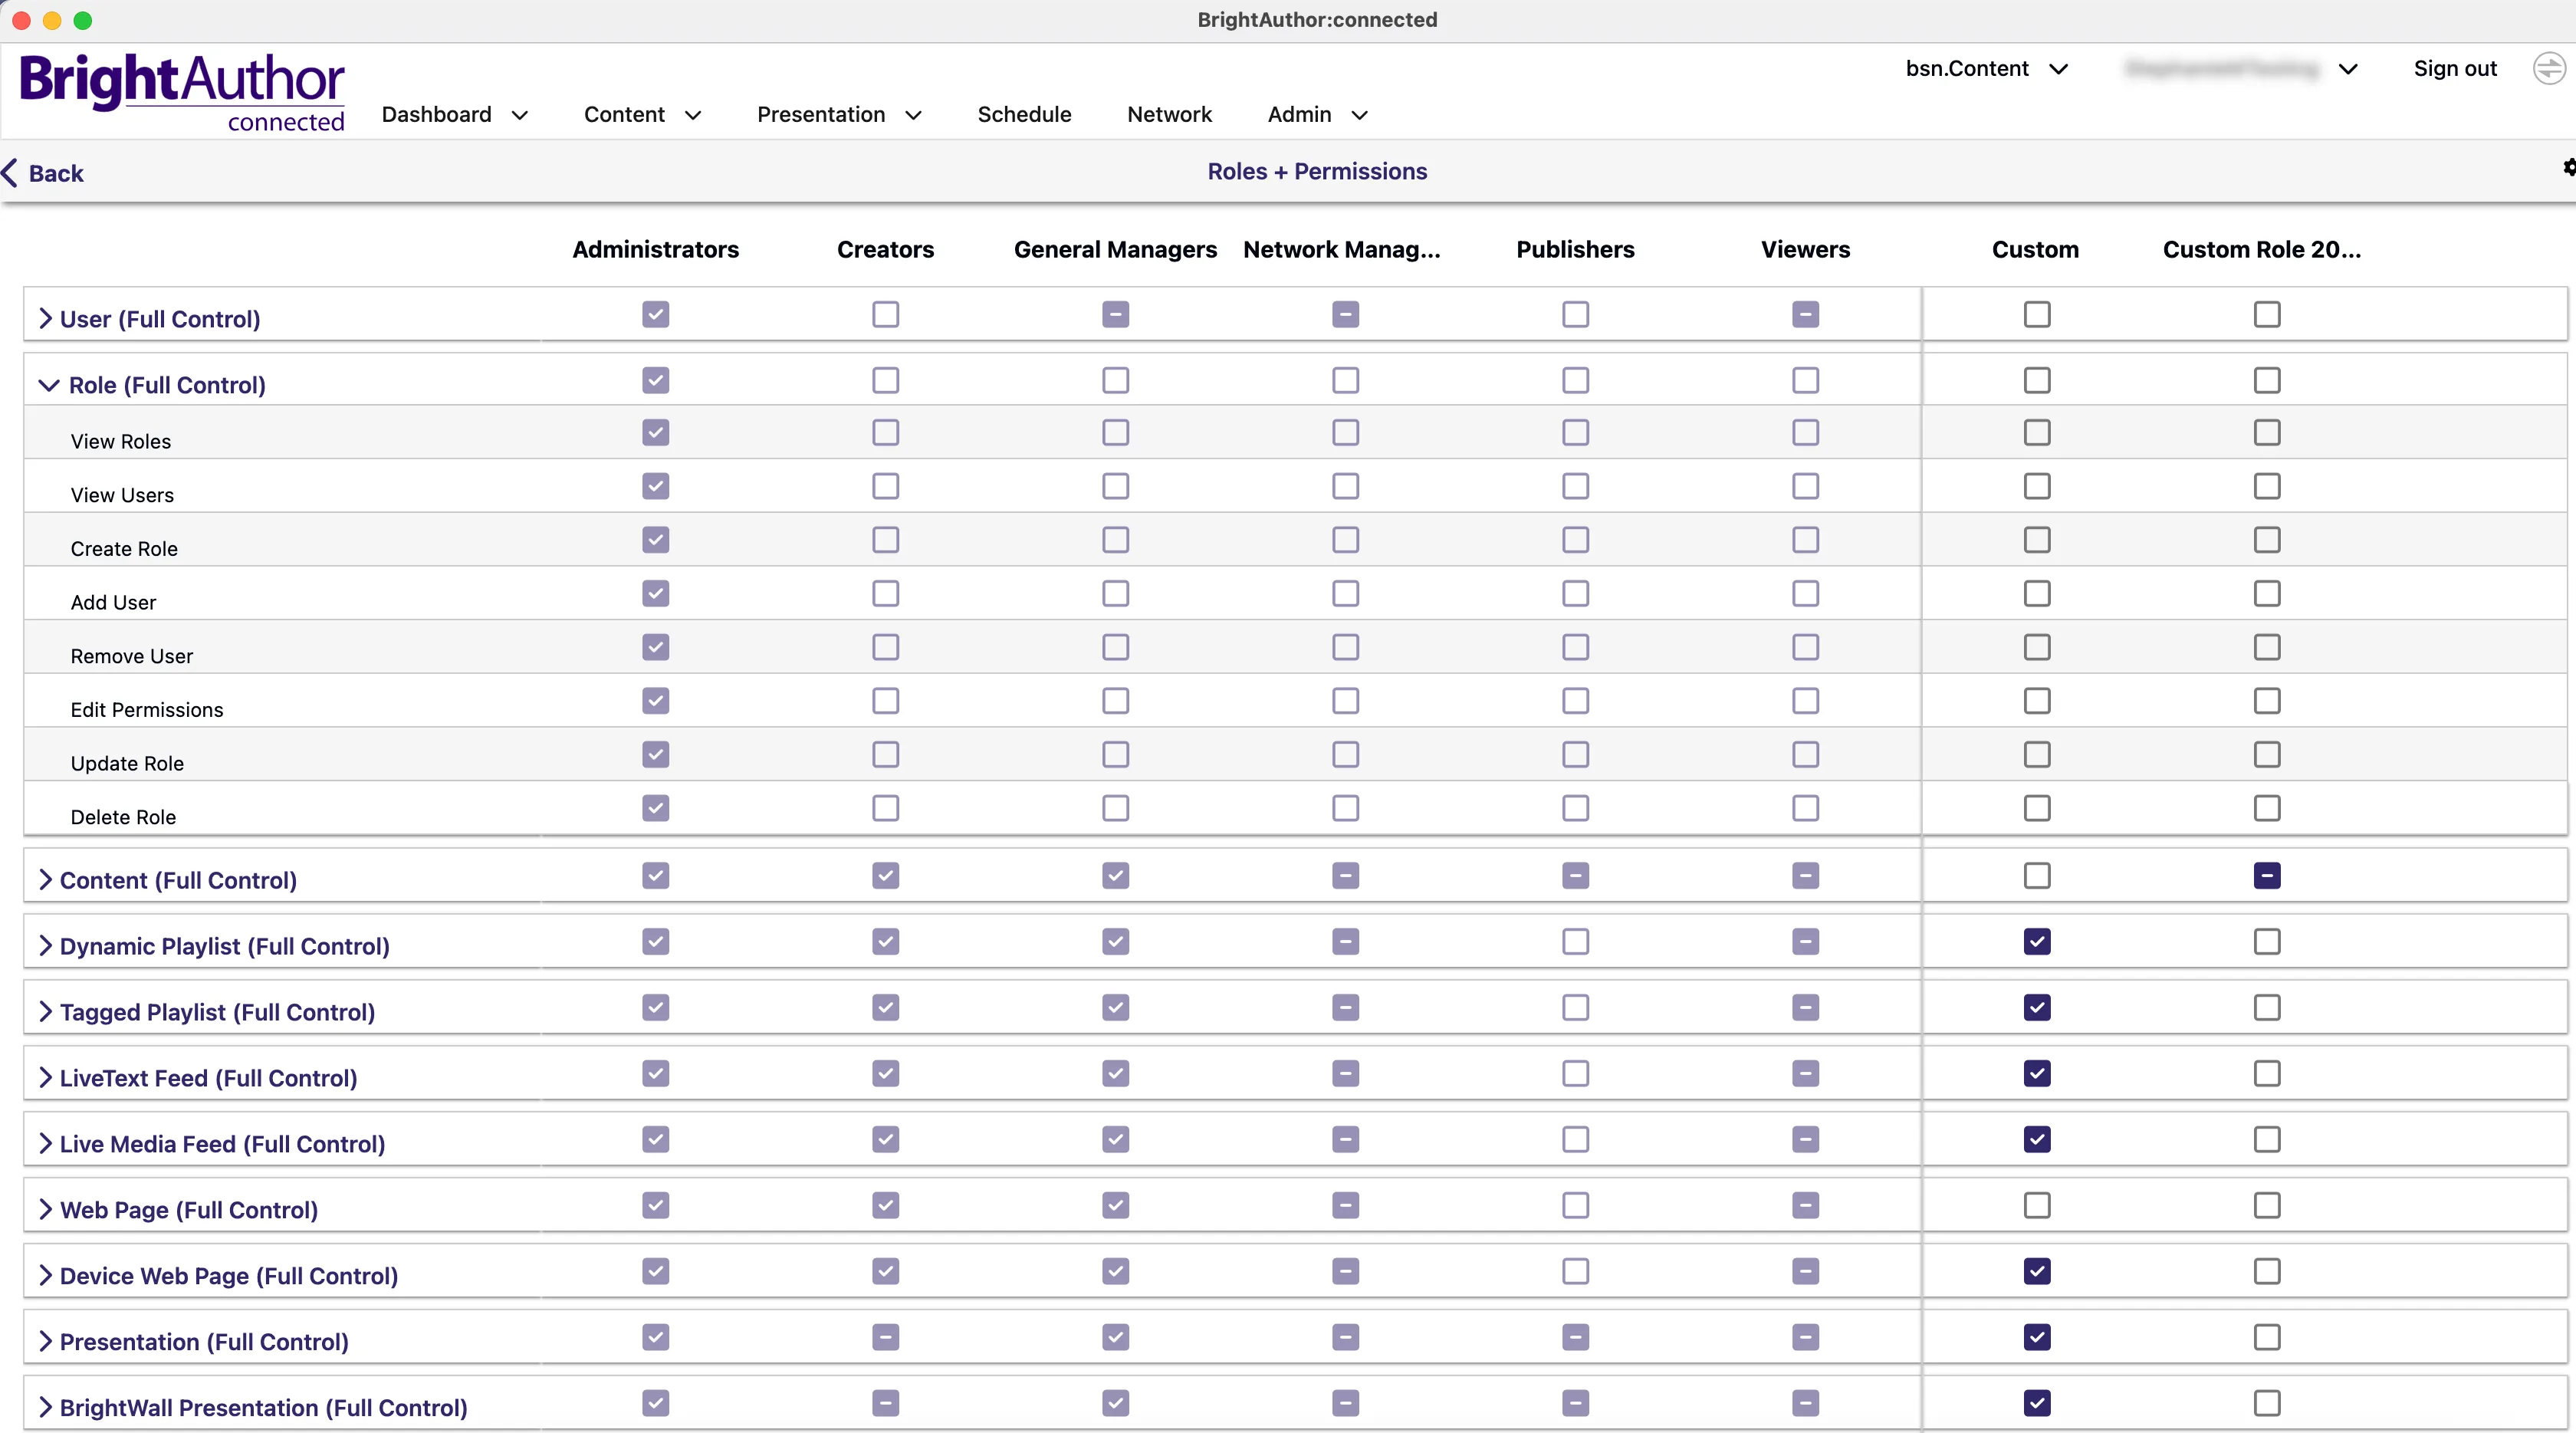
Image 1 shows a table where each row represents operations that users can execute in BrightSign Author Plus. Each operation is associated with one specific entity type (for example, Content or Presentation), on the first level you can see Full Control operations and when expanding the rows, you can find the child operations linked to them. System and Custom Roles are shown in the columns. You can choose which System Roles to display, or delete Custom Roles by clicking the gear button and choosing Delete Role.
Both allowing and denying permissions are inherited by child from the parent operation and may be overridden. For example, you can give Presentation (Full Control) permissions to a content publishing role but ensure that they cannot delete presentations by unchecking Delete Presentations.
To edit Custom Role permissions, expand the rows of the table to find the operation you are looking for. Each time you click on a checkbox in the main area, a system creates a new permission for an operation in that current row and a role in that current column. When the checkbox is set, members of the current role are given permission to execute that operation. When the checkbox is unchecked, the permission to execute that operation is denied.
When reviewing the check boxes in the main area, you may notice the following statuses:
- Active checkbox with a check means that permission has been granted for this operation
- Active checkbox with a dash means that some permissions have been granted for child operations but not this operation
- Grey checkbox with a check means that permission have been granted for this operation and are not editable
- Grey checkbox with a dash means that some permissions have been granted for the child operations and are not editable
- Grey checkbox without a check means that permission is denied for this operation and this cannot be changed
- No check at all means that permission is denied for this operation
Show/Hide Roles
To show or hide System Roles, click on the gear icon at the top right and selecting them under the Show System Roles menu item, as shown in Image 1.

Add Roles
Add a System Role
Click the Edit icon (three gears icon) and select Add Role to add a new role to the network.
- Name: Enter a name for the role
- Description: Enter a custom description for the role
- Copy Permissions from an Existing Role: Select this option to copy permissions from another role on the network. Use the From Role dropdown list to select the role. If you don't enable this option, the custom role will have no permissions by default.
Add a Custom Role
Since there are many individual permissions, it is often easiest to base a Custom Role on one of the preexisting System Roles:
- Go the Admin tab and select Role (you must be signed in to BrightSign Cloud).
- Go to the gear icon at the top right of the page and select Add Role.
- Enter a name and (optional) description for the role.
- You can copy all permissions from a selected role, or define the new role permissions from scratch.
- Select Add Role. Once the role has been created, you can select the check boxes to add or remove additional permissions.

Delete a Role
Click the Edit icon (three gears icon) and select Delete Role to delete a role from the network. Only custom roles can be deleted.
Other
See System Roles and Permissions for more general information about user roles and permissions.
See Object Permissions & Custom Roles for information about using object permissions with custom roles