Network Options
A player's network configuration can be set as part of its Setup. From the Admin > Setup screen, click Network Configuration > Network Options.
Here, you can configure an Ethernet connection, Wi-Fi connection, or USB-connected network access (e.g., a mobile / cellular modem connected via USB) as well as diagnose the player's network connection.
The Network Options screen consists of tabs named Player, Ethernet, Wi-Fi, USB, and Diagnostics, each of which is described below. A red dot will appear next to a tab heading if there is an error or more info is required. In this example, additional info is required to properly configure Wi-Fi:

Player
This tab allows you to configure various player settings.
Host Configuration
- Interface Priority: All network connections that have been enabled are listed here, ordered by priority from highest (top) to lowest (bottom). In the example to the right, the Ethernet connection is the highest priority, then Wi-Fi, then Cellular (via a USB connection). Each listed interface can be dragged and dropped to change their priority. If the higher priority network connection loses connectivity, it will fall back to the next connection in priority. When the higher priority connection is restored, the player will switch back to that connection.
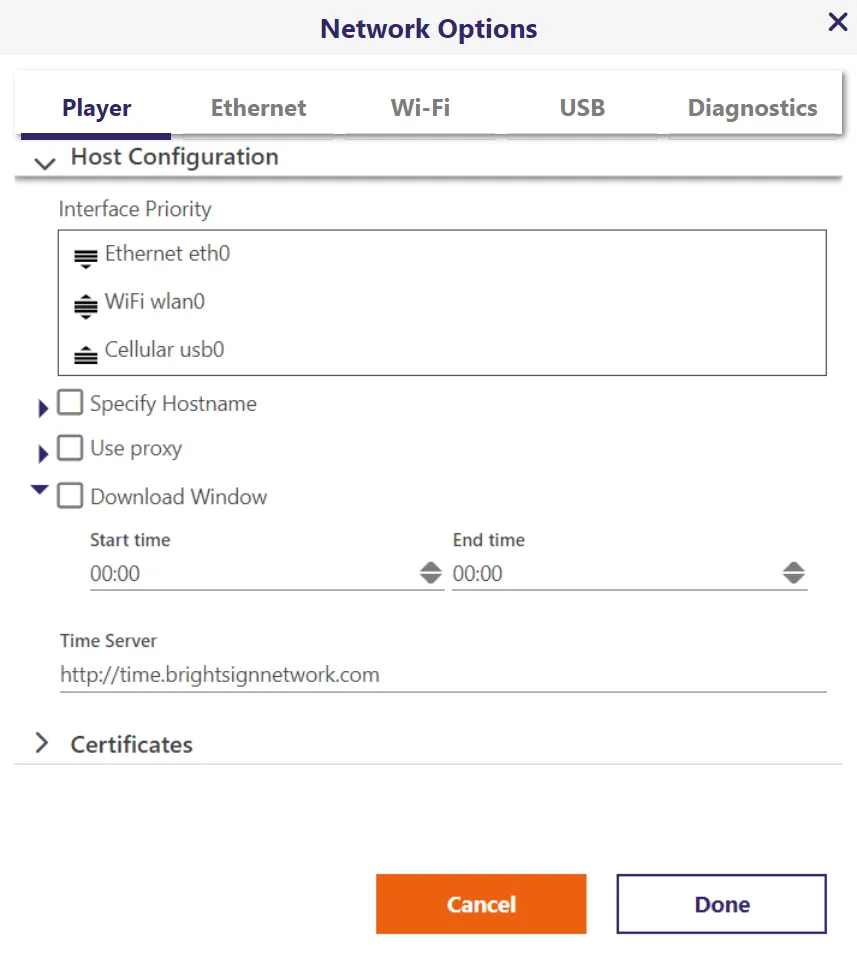
- Specify hostname: Designate a custom hostname for the player on the local network. By default, the player serial number is used to generate a unique hostname (i.e., brightsign-<serial_number>).
- Use Proxy: Configure the player to use a proxy server:
- Address: Set the name or address of the proxy server used for HTTP and FTP requests. The proxy string should be formatted as http://user:password@hostname:port. The hostname can contain up to four * characters; each * character can be used to replace one octet from the current IP address. For example, if the IP address is currently 192.168.1.2, and the proxy is set to proxy-*-*, then the player will attempt to use a proxy named proxy-192.168.
- Download Window: Checking this box restricts player content downloads to a certain time of day or Download Window. This is useful if you want to limit network traffic during certain hours. This option is not applicable to Standalone and Local Network Setups since players using those Setups are not connected to the internet.
- Start time: The beginning of the Download Window in 24-hour format.
- End time: The end of the Download Window in 24-hour format.
- Time Server: Specify the server that the player should use to synchronize its clock. Players use the time server at http://time.brightsignnetwork.com by default. Supported protocols are as follows:
- ntp://host - Uses NTP.
- http://host\[:port\] - Uses HTTP [with an optional port].
- https://host\[:port\] - Uses HTTPS [with an optional port].
- httpns://host[:port] - Uses HTTPS [with an optional port], but ignores cert failures.
Certificates
You can potentially run out of space on your player if you do not remove any existing CA packages before adding new ones. See RemoveCAPackage(package_name As String) As Boolean for information on how to remove a CA package.
Some networks require certification. CA certificates can be added as part of a player's Setup or via API through roKeyStore. To add CA certificates to a player Setup:
- In the BrightSign Author Admin > Setup screen, go to Network Configuration > Network Options and click the Player tab.
- Under the Certificates section, the following fields exist:
- Name: Designate a unique name.
- Certificate: Browse to select the file that you want to add.
- Select Apply to apply the certificate to the Setup.
For more information about CA certificates, see Add Digital Certificates.
Ethernet
Network access over Ethernet is enabled by default.
Network Settings
DHCP Enabled
By default, the player will let a DHCP server automatically assign the player an IP address. Uncheck this to assign a static IP address to the player.
- IP Address: This value must be provided.
- Subnet Mask: This field will error if it fails subnet mask validation.
- Default Gateway: The default gateway is any IPv4 address, The gateway address will be validated against the subnet mask and will error if it is not valid.
- DNS1: This value must be provided to resolve domain names to the IP address.
- DNS2: This value is optional.
- DNS3: This value is optional.
Add VLAN
- VLAN ID: A VLAN ID is optional for physical LAN and required when using one or more virtual LANs.
- Add VLAN: Allows the user to add virtual LANs. Use the trashcan on the top right to delete these additional addresses if they are not needed.
Download Rates
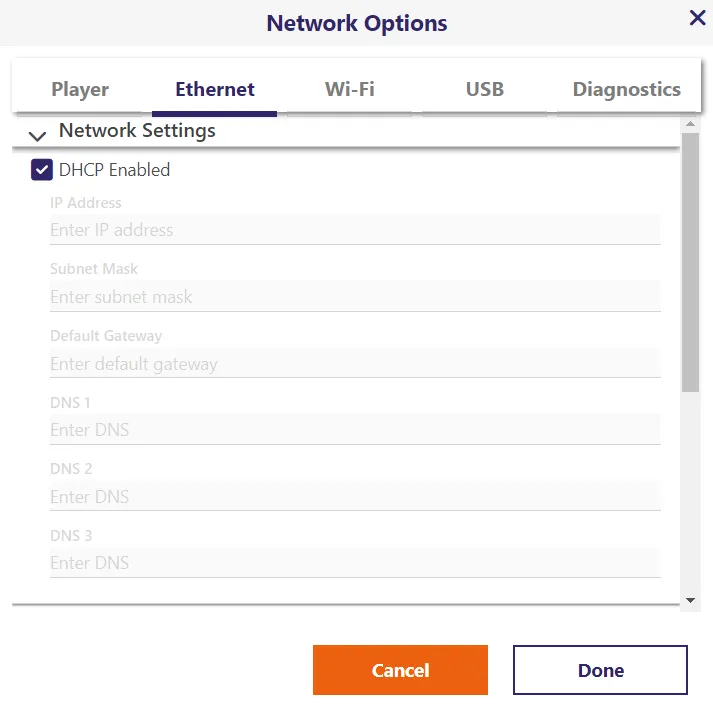
This feature enables you to set rate limits when downloading content. Rate limits can be set for During or Outside the Download Window as well as During Initial Downloads.
- Unlimited Download Rate: Sets no limit on downloads.
- Default limit: Sets the default limit (2,000 kbps) on downloads.
- Specify limit: Sets a customized limit. Enter a limit in the text field in kbps.
Network Security
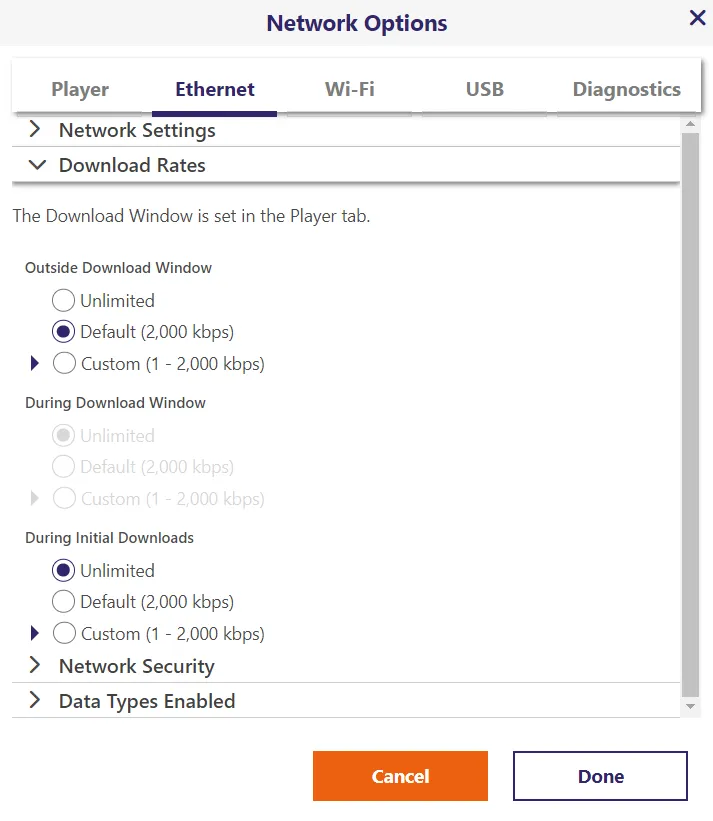
Enable 802.1x
Click to enable 802.1x and select options for the following:
- Network Authentication Variant (EAP-TLS or PEAP / MSCHAPv2)
- EAP-TLS Certificate (PKCS#12 or X.509 PEM/DER).
Data Types Enabled
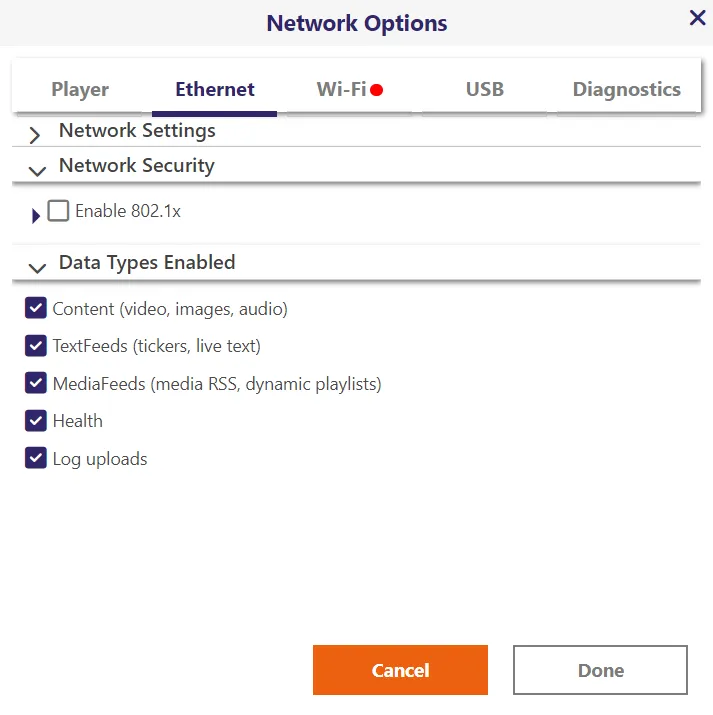
Use the checkboxes to determine the data types that can be transferred using the connection. You can enable/disable downloads (Content, Text Feeds, Media Feeds), as well as uploads (Health, Log Updates).
Wi-Fi
Players can use Wi-Fi to connect to the network via either an internal Wi-Fi module (sold separately; see Wi-Fi, SSD, & Cell Modem Info) or an external Wi-Fi bridge (e.g., a Wi-Fi game adapter connected to the Ethernet port).

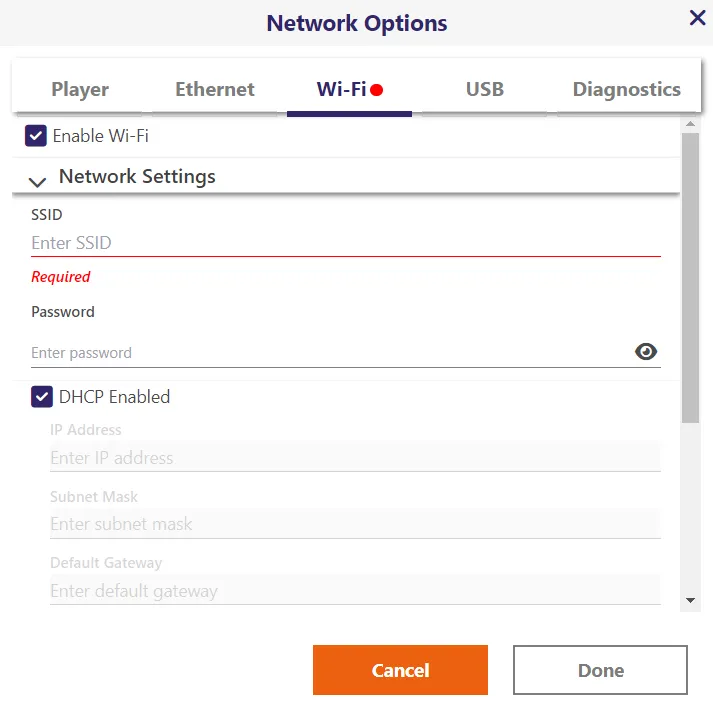
Enable Wi-Fi
Wi-Fi is not enabled by default. Click to enable Wi-Fi.
Network Settings
Specify the required credentials for connecting to the Wi-Fi network.
SSID
Enter the Wi-Fi network's name.
Password
Enter the Wi-Fi network's password.
DHCP Enabled
By default, the player will let a DHCP server automatically assign the player an IP address. Uncheck this to assign a static IP address to the player. The required fields for the static IP address are similar to those described for an Ethernet connection above.
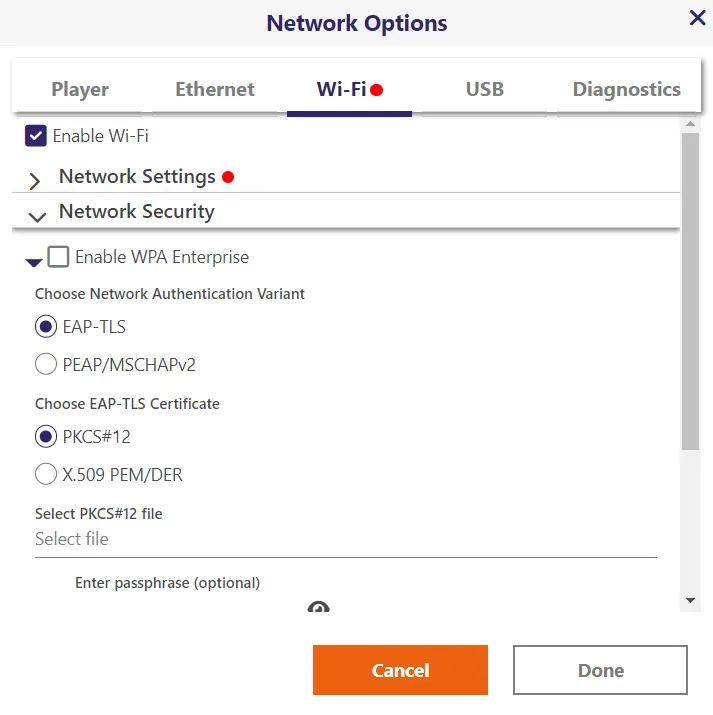
Network Security
Set up authentication for your Wi-Fi connection
Enable WPA Enterprise
Network Authentication Variant
- EAP-TLS: Authenticate using Extensible Authentication Protocol - Transport Layer Security (defined in https://www.rfc-editor.org/rfc/rfc5216.html )
- Choose EAP-TLS Certificate: Select a certificate-based authentication and enter an optional passphrase:
- PKCS#12
- X.509 PEM/DER
- PEAP/MSCHAPv2: Authenticate using Protected Extensible Authentication Protocol.
- Select Additional CA Certificate: This should be the root CA certificate for the CA which signed the authentication server certificate. If omitted, the server certificate will not be validated.
- Data Types Enabled: Use the check boxes to determine the data types that can be transferred using the connection. You can enable/disable downloads (Content, Text Feeds, Media Feeds), as well as uploads (Health, Log Updates).
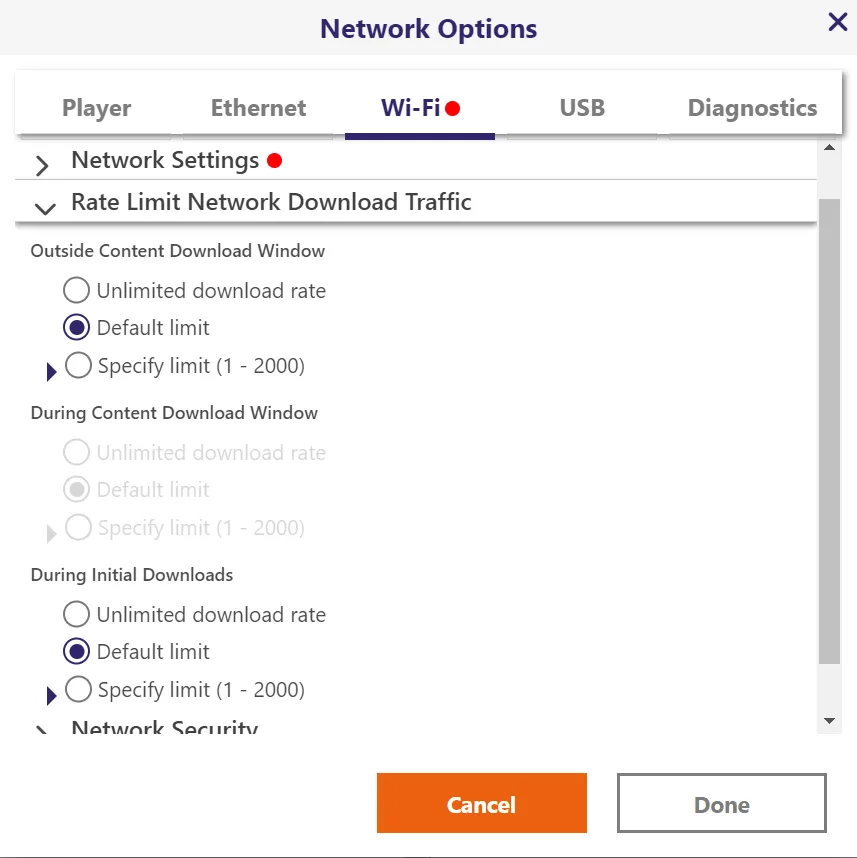
Rate Limit Network Download Traffic
Set rate limits for downloading content. Rate limits can be set for During or Outside the Content Download Window as well as During Initial Downloads.
- Unlimited Download Rate: Sets no limit on downloads.
- Default limit: Sets the default limit (2,000 kbps) on downloads.
- Specify limit: Sets a customized limit. Enter a limit in the text field in kbps.
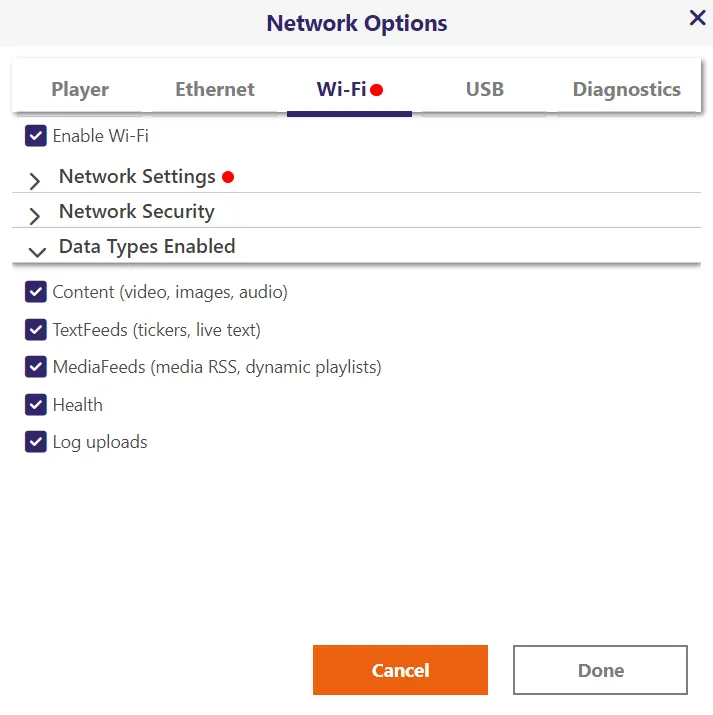
Data Types Enabled
Use the checkboxes to determine the data types that can be transferred using the connection. You can enable/disable downloads (Content, Text Feeds, Media Feeds), as well as uploads (Health, Log Updates).
USB
The USB tab allows you to control the settings for USB-based networking interfaces (e.g., USB modems, USB Ethernet, or Wi-Fi adapters).

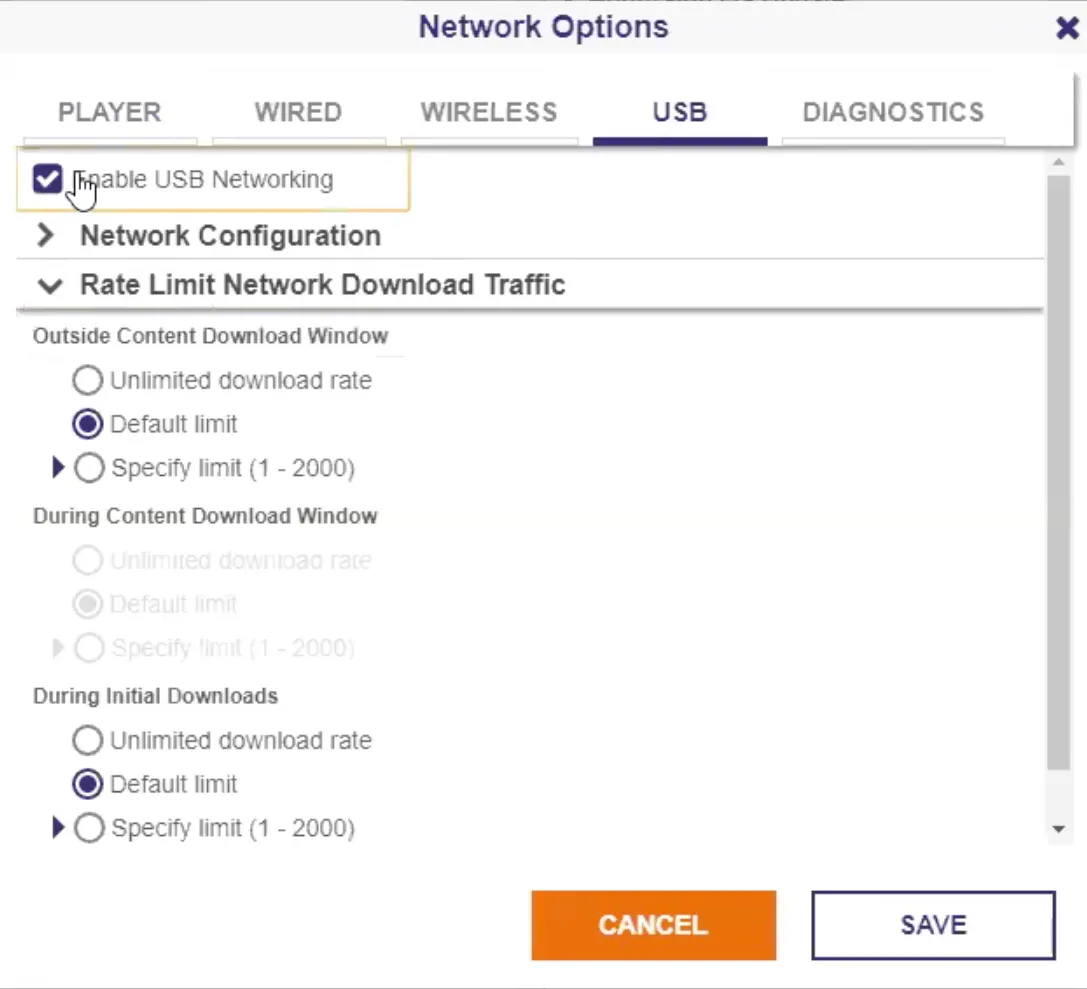
Enable USB Networking
USB Networking is not enabled by default. Click to enable.
Network Settings
Lets you select any of the following options:
- Ethernet:
- Wi-Fi: Enter the SSID and Security Key for DHCP, or a Static Address
- BrightSign Mobile: The BrightSign cell modem will be automatically selected
- Rate Limit Network Download Traffic (this option is only available if Network Configuration is Wi-Fi): Set rate limitations for downloading content. You can also set rate limitations for During content download window and During initial downloads.
- Unlimited Download Rate: Sets no limit on downloads.
- Default limit: Sets the default limit (2000 Kbps) on downloads.
- Specify limit: Sets a customized limit. Enter a limit in the text field (in Kbps).
Diagnostics
- Enable network diagnostics: Have the player display the Network Diagnostics screen during setup. The player will keep rebooting until it passes the specified tests, so in general, only use network diagnostics for testing purposes and turn it off in production environments.
- Test Ethernet: The Network Diagnostics screen will indicate whether or not it was able to attain an IP address over Ethernet.
- Test Wi-Fi: The Network Diagnostics screen will indicate whether or not it was able to attain an IP address over wireless.
- Test Internet Connection: The Network Diagnostics screen will indicate whether or not it was able to communicate with a remote server.