Create GPIO Input
1 min
This example presentation demonstrates how to define GPIO input in BrightSign Author. When GPIO 0 is pressed the presentation will switch from the current video to the next video:
- Create an interactive playlist.
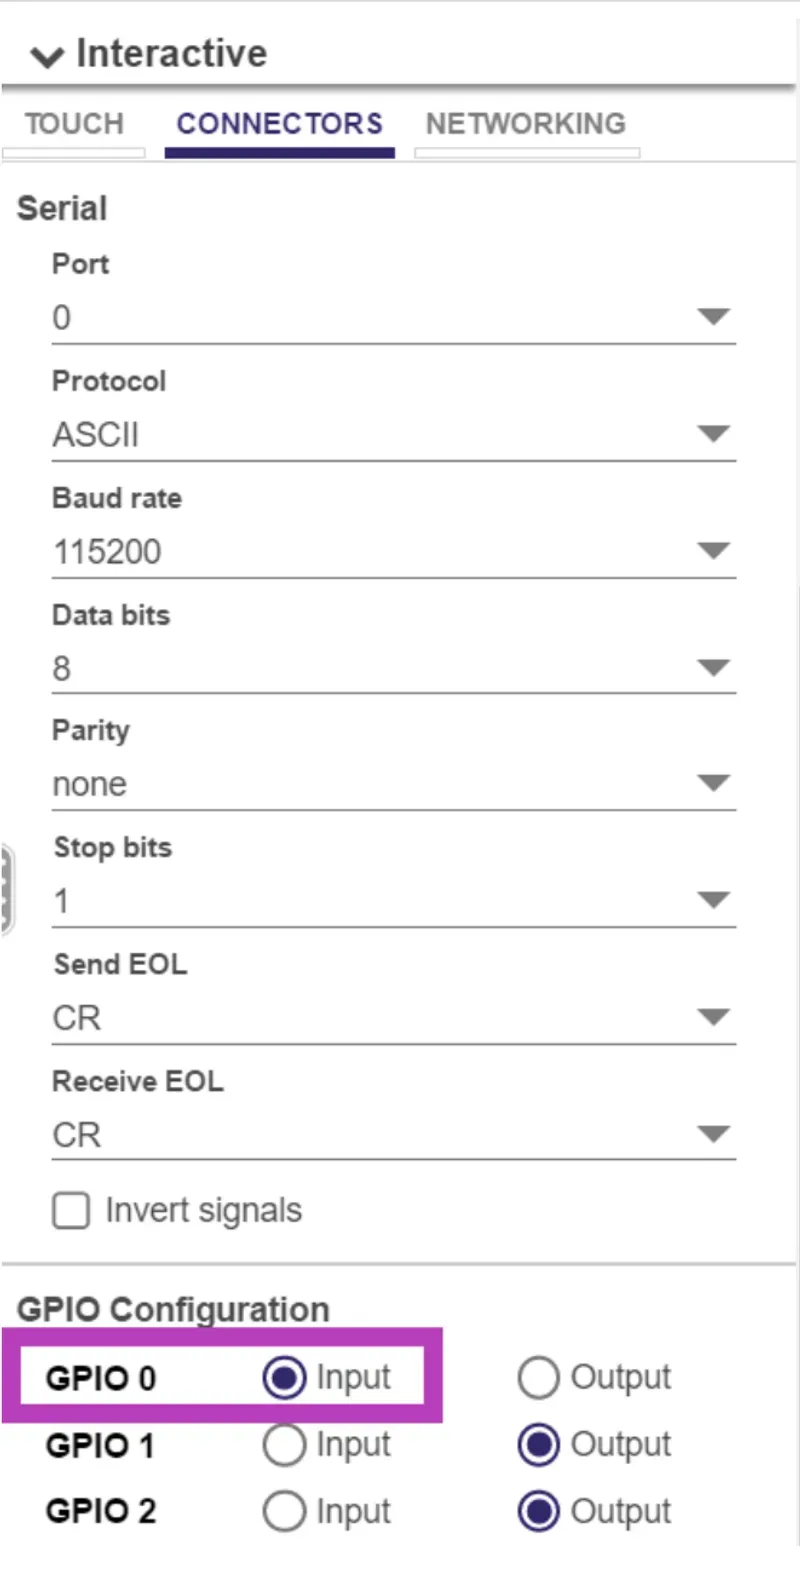
- Go to Presentation Settings > Interactive, and locate the Connectors tab (see Image 1).
- Go to GPIO Configuration and select Input for GPIO 0.
- Add the videos to the playlist.
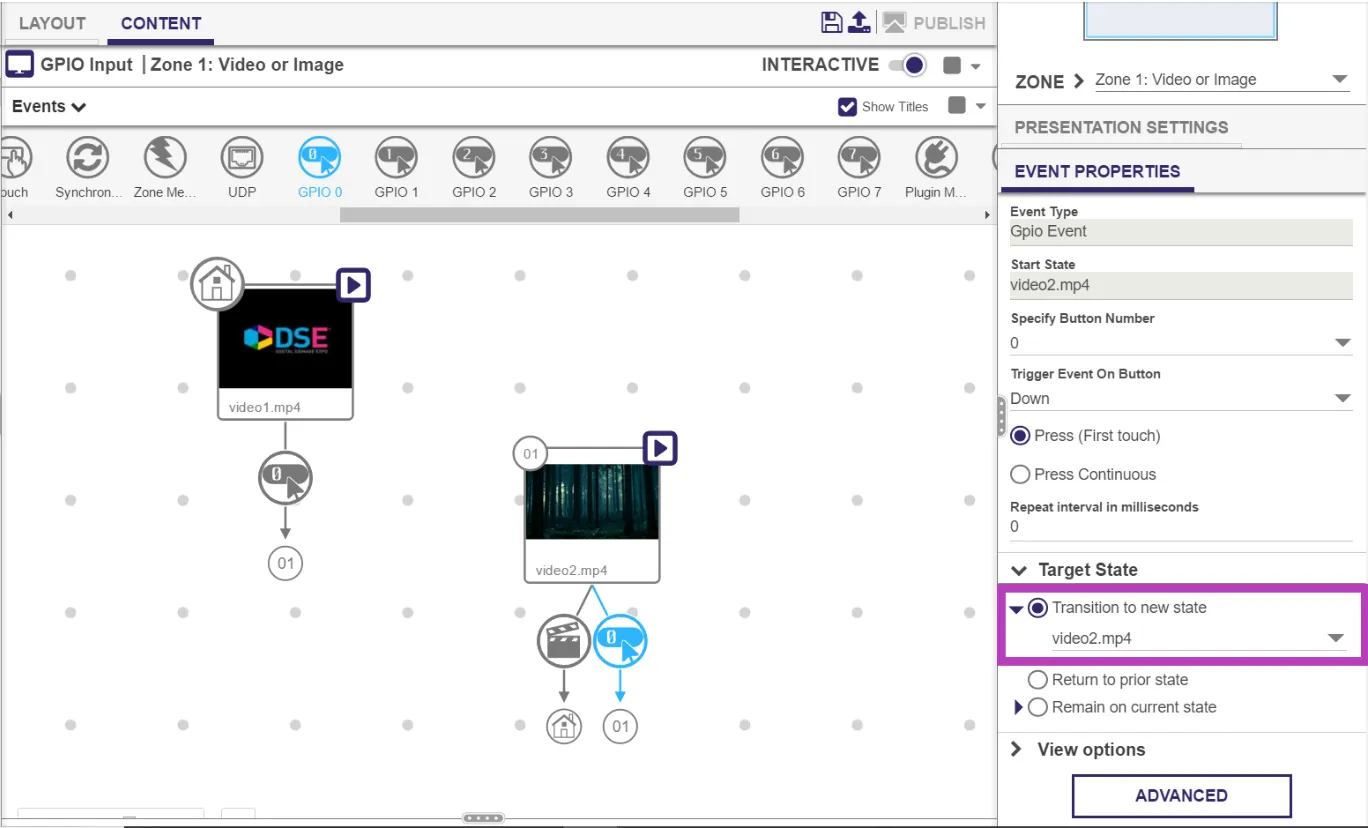
- From the top Events bar, select GPIO 0 and draw a connection from video1.mp4 to video2.mp4.
- Add a Media End event to video2.mp4 to play it immediately after video1.mp4 finishes. While video2.mp4 plays, GPIO 0 input will be ignored.
- To accept GPIO 0 input during video2.mp4 and have it trigger video1.mp4, draw a connection from the video2.mp4 to video1.mp4 state using the GPIO 0 Event from Events. Pushing GPIO 0 will now take you back to video1.mp4.
- Select the GPIO 0 Event stemming from video2.mp4 and in Event Properties > Target State select Transition to new state and select video2.mp4 from the dropdown list (see Image 2). Now, pushing GPIO 0 restarts video2.mp4 instead of taking it back to video1.mp4.
Image 1
Image 2