Step 11: Set Permissions for a Role
Now that the plugin has been installed, you can start assigning permissions to your roles in Intacct by following these steps.
Go to Roles
In Intacct, go to Company → Admin tab → Roles.
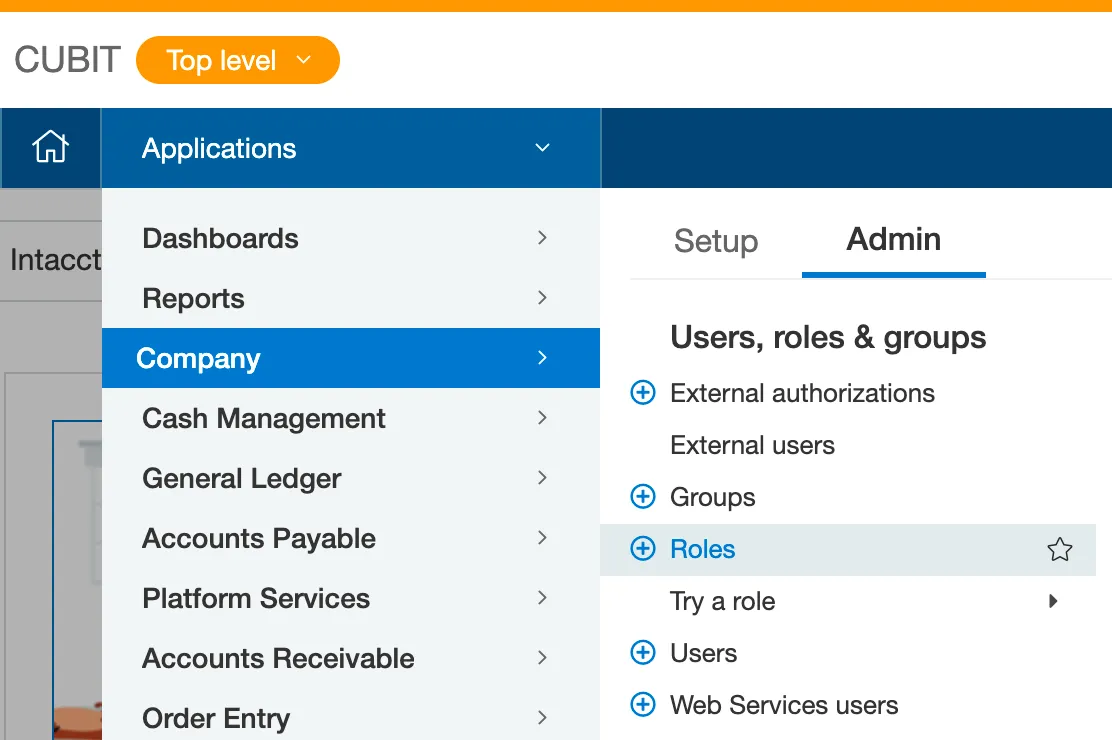
Go to Roles
Assign Permissions
On the J.P. Morgan Pay role, select Subscriptions
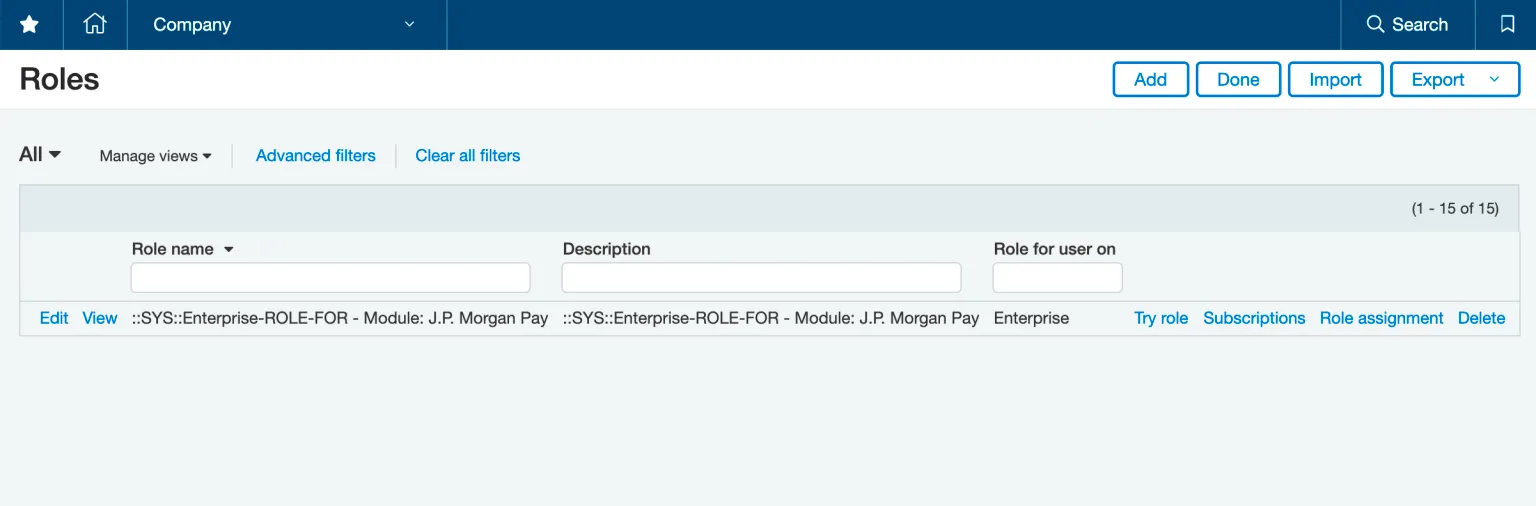
Select Subscriptions
Select Permissions to enable each of the following permissions:
- Cash Management: Checking Accounts (List, View), Savings Accounts (List, View), Credit Card Accounts (List, View)
- Accounts Payable: All Permissions
- Company: Transaction Currencies (List, View), Entities (View), Funds/Locations (View)
- General Ledger: All Permissions
- J.P. Morgan Pay: All Permissions
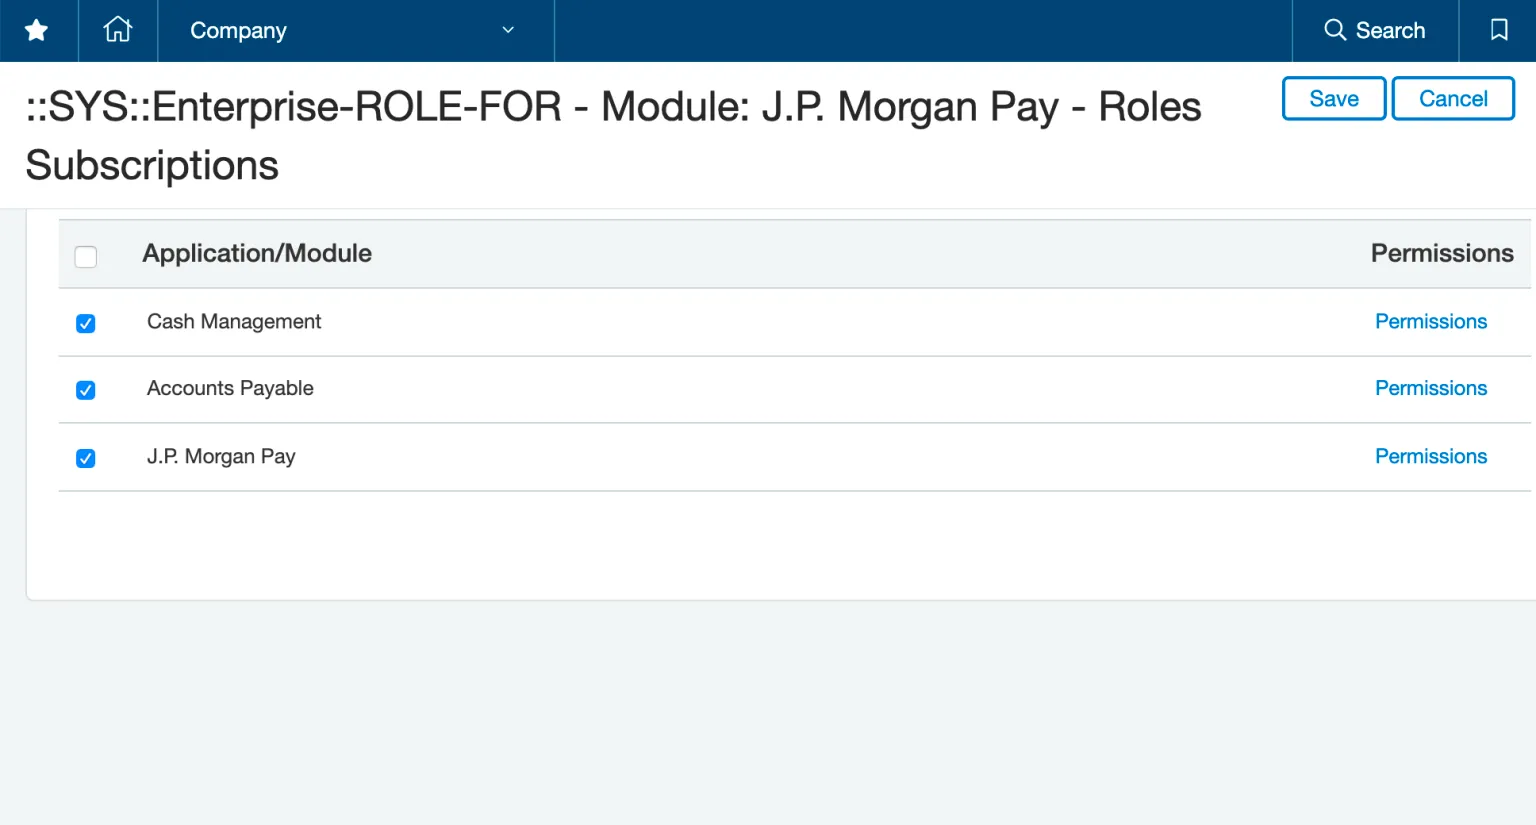
Enable Permissions
If you do not use roles inside Intacct, simply head over to the users and web service user, click Subscriptions, and grant them the following permissions:
- Cash Management: Checking Accounts (List, View), Savings Accounts (List, View), Credit Card Accounts (List, View)
- Accounts Payable: All Permissions
- Company: Transaction Currencies (List, View), Entities (View), Funds/Locations (View)
- General Ledger: All Permissions
- J.P. Morgan Pay: All Permissions

Click Subscriptions
Then, select Save.
Common Errors
If you receive an error message, please confirm that you have granted the appropriate Cash Management permissions to the Web Service User’s role subscription.
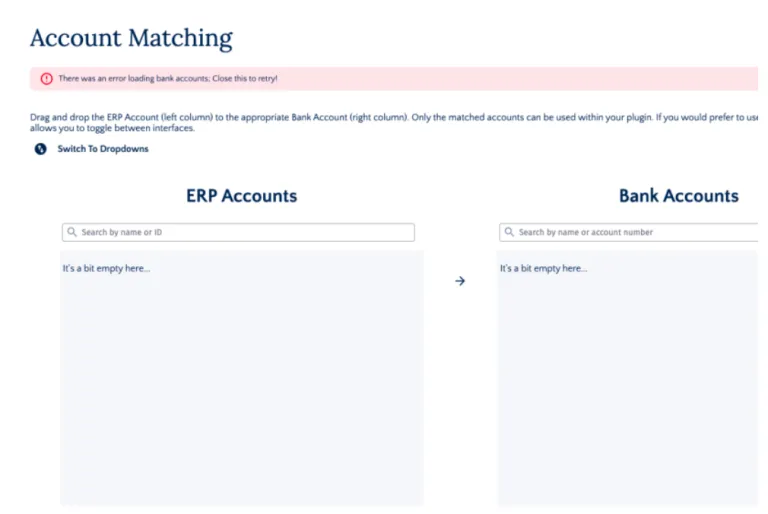
Resolve Errors